
P/A/S/M modes
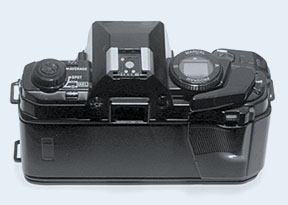
The 9000 features a large control wheel around the top LCD display. It has four settings: Program, A, Manual, and S. Program mode automatically chooses what the camera thinks is the best shutter speed and aperture combination, A (Aperture priority) mode lets you choose the aperture while the camera chooses the shutter speed, S (Shutter priority) mode lets you choose the shutter speed while the camera chooses the aperture, and Manual mode forces you to choose both shutter speed and aperture manually (although with help from the built-in meter). To set the modes, rotate the wheel so the text is aligned with the arrow.
Program mode
The Program mode is the point-and-shoot mode. The camera decides the exposure for itself, using the light metering mode you have specified. It also takes the focal length in account, using something that is called "Auto multi-program selection". What this means in practice is that:
- For focal lengths shorter than 35mm, the camera tries to use a "Wide" setting to maximize depth of field by setting the smallest possible aperture.
- For 35mm to 105mm, a "Standard" setting is used, not prioritizing neither DOF nor speed.
- For longer focal lengths than 105mm, the "Tele" setting is used and a speed prioritization is made, choosing faster shutter speeds to prevent camera shake (which otherwise would lead to unsharp images).
- Program selection is automatic. It is not possible to manually select a specific program. The Program Back Super 90 databack allows you to define your own programs, however.
- With zoom lenses, the program automatically changes as you zoom from one range to the next. With the 28-135mm zoom, for example, as you zoom from 28mm to 135mm, the program changes from Wide through Standard to Tele.
- If the light level is outside the exposure meter's range, the metering indicator in the viewfinder will blink as a warning that the exposure may not be correct.
- If both the shutter speed and the aperture displays blink, the required aperture-shutter speed combination is not available.
Program shift
While in Program mode, you can use the "program shift" feature. Simply, this means that the relationship between shutter speed and aperture is changed, while the total exposure remains exactly the same. For example, if you want to freeze motion with a faster shutter speed, shift to a larger aperture and the camera will automatically set a faster shutter speed to balance it and maintain the same relative exposure. This makes it a perfect tool for easy adjustment of depth of field or shutter speed while keeping the full automation of the camera. To use it, just use the shutter speed or aperture control levers to set any value you want and watch the other value change. "P" in the viewfinder blinks to indicate when program shift is in use.
- If you lift your finger from the shutter release button (the touch-sensitive switch), program shift will be canceled after ten seconds, defaulting to normal program mode.
- After an exposure, program shift is cancelled as soon as you lift your finger from the shutter release button. To keep shooting using the same (shifted) setting, let your finger rest on the button between the shots.
- When using a zoom lens, the program changes from Standard to Tele as referenced above, and the shifted setting will most probably change. Thus it's most practical to shift the exposure after zooming.
- Shifting the exposure on a 9000 means that the aperture setting is shifted in half-stops increments and the shutter speed setting will follow steplessly. This means that if lighting conditions change, the aperture will remain the same, and the camera will adjust the shutter speed accordingly. There is no way to shift the exposure to a constant shutter speed and having the aperture follow, as is the case on more modern Minoltas. For such cases you have to use the S mode.
A mode
In A (Aperture priority) mode, you select the aperture and the camera automatically sets the shutter speed required for proper exposure. Any aperture available on the lens can be set. This mode can be used when you want to control the range of sharpness (i.e., depth of field) in a photograph, as for making a large part of the scene sharply focused or emphasizing a subject against an out-of-focus background. You can read more about this in the sections "the aperture" and "controlling depth of field".
- You can use either of the control levers to set the aperture.
- If the camera's maximum shutter speed (4000) blinks, set smaller apertures until the blinking stops. If the longest speed (30") blinks, set larger apertures. Blinking indicates that the camera can't select an shutter speed that matches the currently selected aperture.
- If the light level is outside the exposure meter's range, the metering indicator in viewfinder will blink as a warning that the exposure may not be correct.
S mode
In S (Shutter priority) mode, you select the shutter and the camera automatically sets the aperture required for proper exposure. Any available shutter speed from 1/4000 sec. to 30 seconds can be set. This mode can be used when you want to control the shutter speed exactly, such as when you photograph a moving subject.
- You can use either of the control levers to set the shutter speed.
- If the lens' maximum aperture (e.g. f/1.4) blinks, set slower shutter speeds until the blinking stops. If the minimum aperture (e.g. f/22) blinks, set faster shutter speeds. Blinking indicates that the camera can't select an aperture that matches the currently selected shutter speed.
- If the light level is outside the exposure meter's range, the metering indicator in viewfinder will blink as a warning that the exposure may not be correct.
- In S mode, do not use the "bulb" setting, which appears after the 30 sec. setting. "Bulb" should only be used in M mode.
Manual mode
In the Manual mode, you have complete manual control over the shutter speed and aperture. You have to set them manually with the aperture and shutter speed levers. Even if the camera will still meter, giving you information about the correct exposure, you can choose to override it. The exposure-deviation indicator appears in the viewfinder when the meter is on (touch the shutter-release button to activate it). For normal exposure based on the camera's TTL meter, adjust the up/down controls as indicated in the viewfinder. Some typical readouts are:
- "-0" or "+0" indicates that the exposure is set within +-1/4 stop of normal exposure.
- "+2" indicates that the exposure is set for two stops greater than required for a normal exposure (overexposure).
- "-1" indicates exposure is set for one stop less than required for normal exposure (underexposure).
It must be noted (again) that the exposure-deviation indicator is according to what the camera's meter thinks and doesn't represent an "ideal" exposure -- you have to judge that yourself, and that's what the "Manual" mode is (mostly) about.
- If exposure adjustment is set with the camera in M mode, a +/- mark will not appear in the data panel. However, indication for normal exposure includes the set value. For example, if the exposure would normally be 1/60 seconds at f/5.6, when exposure adjustment is set to +1.0 the meter will indicate normal exposure to be either 1/60 at f/4 or 1/30 at f/5.6.