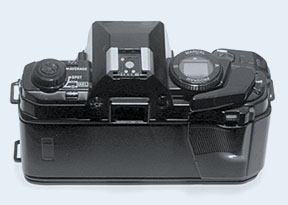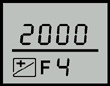
Exposure adjustment
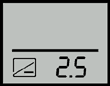
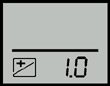
Exposure adjustment is used to deliberately increase or decrease exposure from the normal metered value. Adjustment range is from +4 to -4 stops in half-stop increments. To set:
- Press and hold the exposure adjustment button (marked +/-).
- Move the shutter speed lever until the desired value appears in the data panel. Set minus (-) numbers to decrease exposure and plus (+) numbers to increase exposure.
Typical situations
When you use center-weighted average metering, the following suggestions will help you decide whether to use exposure adjustment. Individual conditions and intentions will, of course, determine which exposure you choose.
- When the background is much brighter than the main subject: Set exposure adjustment between +0.5 and +2.0 steps, depending on lighting conditions.
- When the main subject is much lighter than the background: Set exposure adjustment between -0.5 and -2.0 stops, depending on lighting conditions. This exposure adjustment can also be used for spotlit subjects, as at a circus or on a stage.
- For scenes where most of the tones are very light, such as snow-covered hillsides: An adjustment of +0.5 to +2.0 stops may be necessary. Similarly, an adjustment of -0.5 to -2.0 stops can be used when the overall scene is composed of mostly darker tones, as like a black cat against a dark background.
- Exposure adjustment can also be used to vary exposure in half-stops for series of photographs of the same scene. This technique, known as "bracketing", is especially useful when you are not sure which exposure will look best, as when photographing a sunset.
NOTE
- Reset exposure adjustment to "+-0.0" after use.
- Exposure adjustment is reset if the camera batteries are removed.
- When using an R60 (red) filter, adjust the exposure with +1.0 stop.